티스토리 뷰
서론
본 포스팅에서는 VirtualBox로 생성한 Virtual Machine의 Disk 사이즈를 변경하는 방법에 대해 알아보겠습니다.
초기 디스크 사이즈를 default로 지정할 경우 디스크는 8GB로 지정됩니다.
현재 포스팅 중인 클라우드 환경의 폐쇄망 환경을 구성하다보니 CI Server로 사용할 VM의 사이즈가 부족하여 이를 8GB에서 40GB로 증설해 보도록 하겠습니다.
현재 디스크 확인하기
실습 환경
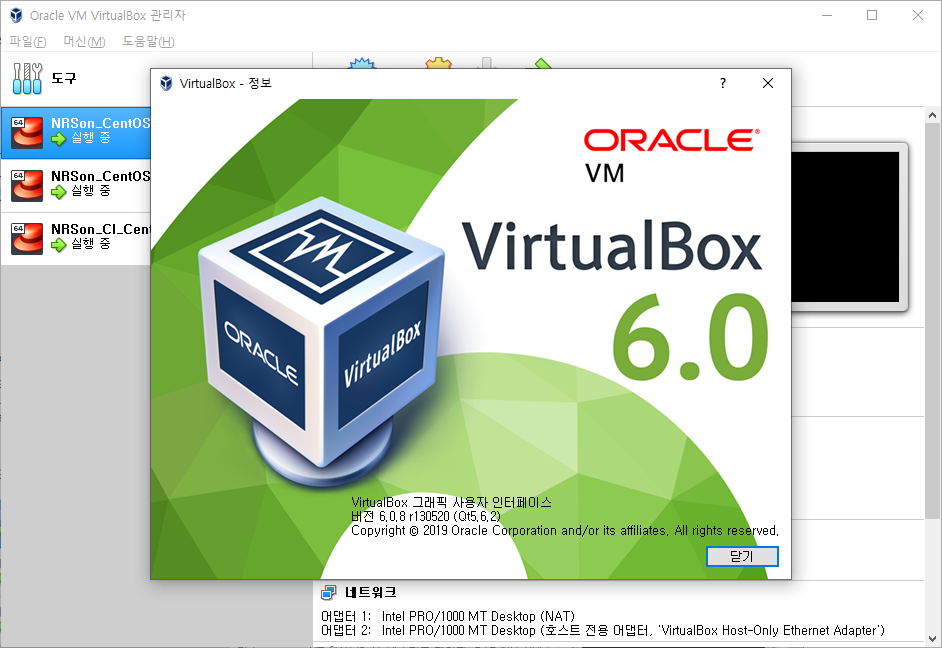
- VirtualBox 6.0.8

- CentOS 7.6.1810
|
[root@kubemaster ~]# cat /etc/redhat-release CentOS Linux release 7.6.1810 (Core) [root@kubemaster ~]# |
현재 VM에 할당된 디스크는 다음과 같이 확인 가능합니다.
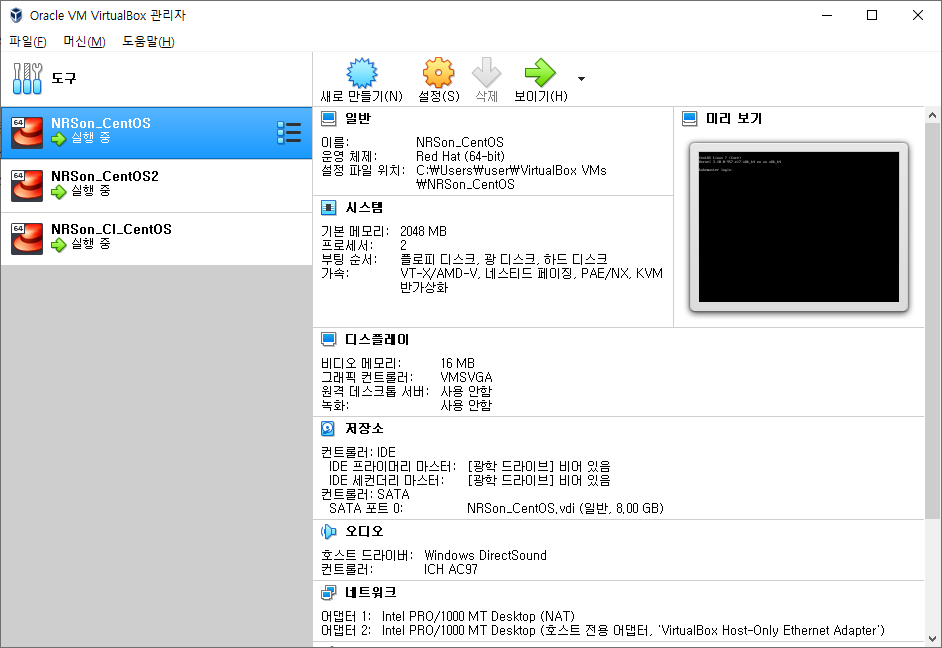
1) Oracle VM VirtualBox 관리자 화면

- 각 Virtual Machine의 저장소 / SATA포트 0: NRSon_CentOS.vdi (일반, 8.00 GB)
2) Linux 명령어
fdisk -l
|
[root@kubemaster ~]# fdisk -l Disk /dev/sda: 8589 MB, 8589934592 bytes, 16777216 sectors Units = sectors of 1 * 512 = 512 bytes Sector size (logical/physical): 512 bytes / 512 bytes I/O size (minimum/optimal): 512 bytes / 512 bytes Disk label type: dos Disk identifier: 0x000a3fc4 Device Boot Start End Blocks Id System /dev/sda1 * 2048 2099199 1048576 83 Linux /dev/sda2 2099200 16777215 7339008 8e Linux LVM Disk /dev/mapper/centos-root: 6652 MB, 6652166144 bytes, 12992512 sectors Units = sectors of 1 * 512 = 512 bytes Sector size (logical/physical): 512 bytes / 512 bytes I/O size (minimum/optimal): 512 bytes / 512 bytes Disk /dev/mapper/centos-swap: 859 MB, 859832320 bytes, 1679360 sectors Units = sectors of 1 * 512 = 512 bytes Sector size (logical/physical): 512 bytes / 512 bytes I/O size (minimum/optimal): 512 bytes / 512 bytes [root@kubemaster ~]# |
- fdisk로 확인해 보면 위 빨간색으로 표시한 것과 같이 OS Boot 영역인 /dev/sda1과 LVM(Logical Volume) 영역인 /dev/sda2 영역으로 구분되어 있으며 두 합이 8589MB 즉 8GB인 것을 확인할 수 있습니다.
df -h
|
[root@kubemaster ~]# df -h Filesystem Size Used Avail Use% Mounted on /dev/mapper/centos-root 6.2G 4.5G 1.8G 72% / devtmpfs 908M 0 908M 0% /dev tmpfs 920M 0 920M 0% /dev/shm tmpfs 920M 13M 907M 2% /run tmpfs 920M 0 920M 0% /sys/fs/cgroup /dev/sda1 1014M 146M 869M 15% /boot ... ... tmpfs 184M 0 184M 0% /run/user/0 [root@kubemaster ~]# |
- df 실행 결과 위와 같이 LVM 영역에서 사용 가능한 Volume 영역이 6.2GB이고 현재 72% 사용 중인 것을 확인할 수 있습니다.
VitualBox에 디스크 추가 할당하기
1) 호스트 OS 설정하기
먼저 VirtualBox가 설치되어 있는 호스트 OS에서 디스크를 추가하고자 하는 VM을 RESIZING합니다.
VM 이미지인 vdi의 저장 위치는 다음에서 확인 가능합니다.

- cd C:\Program Files\Oracle\VirtualBox
- VBoxManage.exe modifyhd "C:\Users\user\VirtualBox VMs\NRSon_CentOS\NRSon_CentOS.vdi" --resize 40960

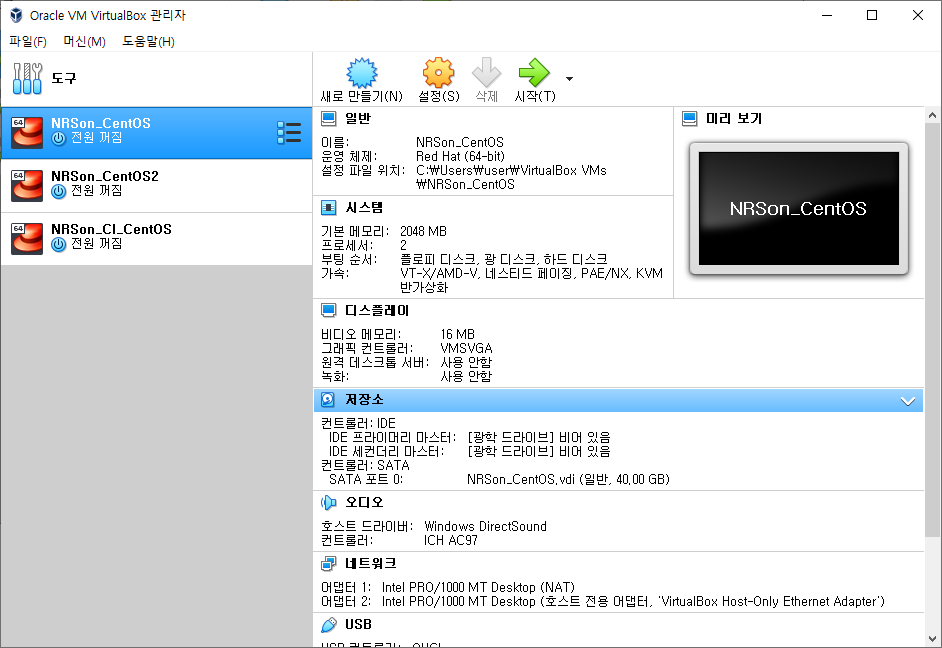
resize가 완료되면 다시 디스크 사이즈를 확인해 보도록 하겠습니다.


기존 저장소 SATA 포트 0의 사이즈가 8.00GB → 40.00GB로 증가되어 있는 것을 확인할 수 있습니다.
2) VM 내부 작업
이제 호스트 OS에서 확인이 완료되면 VM에 접속합니다.
fdisk -l
|
[root@kubemaster ~]# fdisk -l Disk /dev/sda: 42.9 GB, 42949672960 bytes, 83886080 sectors Units = sectors of 1 * 512 = 512 bytes Sector size (logical/physical): 512 bytes / 512 bytes I/O size (minimum/optimal): 512 bytes / 512 bytes Disk label type: dos Disk identifier: 0x000a3fc4 Device Boot Start End Blocks Id System /dev/sda1 * 2048 2099199 1048576 83 Linux /dev/sda2 2099200 16777215 7339008 8e Linux LVM Disk /dev/mapper/centos-root: 6652 MB, 6652166144 bytes, 12992512 sectors Units = sectors of 1 * 512 = 512 bytes Sector size (logical/physical): 512 bytes / 512 bytes I/O size (minimum/optimal): 512 bytes / 512 bytes Disk /dev/mapper/centos-swap: 859 MB, 859832320 bytes, 1679360 sectors Units = sectors of 1 * 512 = 512 bytes Sector size (logical/physical): 512 bytes / 512 bytes I/O size (minimum/optimal): 512 bytes / 512 bytes [root@kubemaster ~] |
현재 /dev/sda Physical Volume(PV)에는 42.9GB가 할당되어 있으며, Logical Volume(LVM)에는 기존 할당된 8GB만 할당되어 있습니다.
Device가 /dev/sda1, /dev/sda2 두개가 초기 생성되어 있고 이 중 Boot Device인 /dev/sda1은 초기화 해서는 안되며, /dev/sda2를 초기화하고 재 할당하도록 합니다.
|
[root@kubemaster ~]# df -h ... ... 하단 1번 STEP [root@kubemaster ~]# fdisk /dev/sda Welcome to fdisk (util-linux 2.23.2). Changes will remain in memory only, until you decide to write them. Be careful before using the write command. 하단 2번 STEP Command (m for help): p Disk /dev/sda: 42.9 GB, 42949672960 bytes, 83886080 sectors Units = sectors of 1 * 512 = 512 bytes Sector size (logical/physical): 512 bytes / 512 bytes I/O size (minimum/optimal): 512 bytes / 512 bytes Disk label type: dos Disk identifier: 0x000a3fc4 Device Boot Start End Blocks Id System /dev/sda1 * 2048 2099199 1048576 83 Linux /dev/sda2 2099200 16777215 7339008 8e Linux LVM 하단 3번 STEP Command (m for help): d Partition number (1,2, default 2): 2 Partition 2 is deleted 하단 4번 STEP Command (m for help): n Partition type: p primary (1 primary, 0 extended, 3 free) e extended Select (default p): p Partition number (2-4, default 2): 2 First sector (2099200-83886079, default 2099200): (Enter) Using default value 2099200 Last sector, +sectors or +size{K,M,G} (2099200-83886079, default 83886079): (Enter) Using default value 83886079 Partition 2 of type Linux and of size 39 GiB is set 하단 5번 STEP Command (m for help): t Partition number (1,2, default 2): 2 Hex code (type L to list all codes): 8e Changed type of partition 'Linux' to 'Linux LVM' 하단 6번 STEP Command (m for help): p Disk /dev/sda: 42.9 GB, 42949672960 bytes, 83886080 sectors Units = sectors of 1 * 512 = 512 bytes Sector size (logical/physical): 512 bytes / 512 bytes I/O size (minimum/optimal): 512 bytes / 512 bytes Disk label type: dos Disk identifier: 0x000a3fc4 Device Boot Start End Blocks Id System /dev/sda1 * 2048 2099199 1048576 83 Linux /dev/sda2 2099200 83886079 40893440 8e Linux LVM 하단 7번 STEP Command (m for help): w The partition table has been altered! Calling ioctl() to re-read partition table. WARNING: Re-reading the partition table failed with error 16: Device or resource busy. The kernel still uses the old table. The new table will be used at the next reboot or after you run partprobe(8) or kpartx(8) Syncing disks. [root@kubemaster ~]# 하단 8번 STEP [root@kubemaster ~]# reboot now |
순서는 다음과 같습니다.
1) fdisk /dev/sda를 입력하여 /dev/sda Physical Volume에 대한 구성을 변경합니다.
2) p를 입력하여 Partition Table을 확인합니다.
3) d를 입력하여 delete 할 Partition Table을 지정합니다. 2를 입력하여 /dev/sda2를 삭제합니다.
- 유의 사항으로 boot partition인 /dev/sda1을 삭제하지 않도록 해야합니다.
4) n을 입력하여 New Partition Table을 생성합니다. p를 입력하여 Partition을 선택하며, 2를 입력하여 삭제한 /dev/sda2 Partition 생성합니다. Partition의 First sector과 Last sector 값을 임의로 지정할 수 있지만, 남은 디스크 전체를 할당하기 위해 엔터를 누르도록 합니다.
5) t를 입력하여 Partition Table을 선택합니다. 2를 입력하고, 8e를 입력하여 Partition Type을 Linux LVM으로 설정 지정합니다.
6) 다시 p 를 입력하면 /dev/sda2의 Partition Table의 크기가 증가한 것을 확인할 수 있습니다.
7) 마지막으로 w를 입력하여 partition table을 저장합니다.
8) 작업이 완료되면 Virtual Machine을 Rebooting하도록 합니다.
|
[root@kubemaster ~]# pvresize /dev/sda2 Physical volume "/dev/sda2" changed 1 physical volume(s) resized or updated / 0 physical volume(s) not resized [root@kubemaster ~]# pvscan PV /dev/sda2 VG centos lvm2 [<39.00 GiB / 32.00 GiB free] Total: 1 [<39.00 GiB] / in use: 1 [<39.00 GiB] / in no VG: 0 [0 ] [root@kubemaster ~]# |
리부팅이 완료되면 pvresize 명령어로 /dev/sda2 partition의 resize를 update합니다. pvscan으로 업데이트 된 볼륨을 확인합니다.
|
[root@kubemaster ~]# df -h ... ... [root@kubemaster ~]# lvextend -l +100%FREE /dev/mapper/centos-root ... ... |
마지막으로 Pyisical Volume을 Logical Volume에 매핑하는 작업을 진행합니다.
lvextend로 매핑 정보를 지정하며, lvresize로 매핑에 disk를 할당합니다.
할당전과 할당 후의 df -h 결과값을 비교해 보면 위와 같이 기존 6.2GB에서 39GB로 증가한 것을 확인할 수 있습니다.
'⑥ 네트워크, 운영체제 > ⓞ OS' 카테고리의 다른 글
| 5분만에 NFS 구축하기 (CentOS7) (0) | 2020.03.02 |
|---|---|
| [VirtualBox 네트워크 구성] 호스트 to 게스트, 게스트 to 게스트, 게스트 to 인터넷 연결 방법 (0) | 2019.08.04 |
| [VirtualBox 구성] Windows에 CentOS 구성하기 (0) | 2019.05.26 |
| [Ubuntu] Default root Passwd 설정 방법 (0) | 2018.08.03 |
| [Ubuntu] 설치 가이드 by Virtual Box (0) | 2018.08.03 |
- Total
- Today
- Yesterday
- MSA
- k8s
- kubernetes
- apache
- JEUS6
- jeus
- node.js
- 쿠버네티스
- Da
- 오픈스택
- aa
- Architecture
- aws
- wildfly
- JEUS7
- TA
- 마이크로서비스 아키텍처
- Docker
- git
- SA
- 아키텍처
- OpenStack
- API Gateway
- webtob
- nodejs
- SWA
- JBoss
- 마이크로서비스
- openstack token issue
- openstack tenant
| 일 | 월 | 화 | 수 | 목 | 금 | 토 |
|---|---|---|---|---|---|---|
| 1 | 2 | 3 | 4 | 5 | 6 | 7 |
| 8 | 9 | 10 | 11 | 12 | 13 | 14 |
| 15 | 16 | 17 | 18 | 19 | 20 | 21 |
| 22 | 23 | 24 | 25 | 26 | 27 | 28 |
