
티스토리 뷰
[Spring Boot] git clone을 활용한 Spring Boot 프로젝트 repository 이관
GodNR 2019. 7. 27. 23:29이번 포스팅에서는 git repository 이관 과정에 대해 살펴보겠습니다.
github → gitlab, gitlab → github 등으로 소스 레포지토리를 이관할 때나 github에 공개되어 있는 Repository를 내 레포지토리로 이관하여 커스터마이징하고 싶을 때 등 다양한 케이스로 git clone을 사용할 수 있습니다.
github repository를 내부 저장소의 gitlab으로 이관하기
1) git clone으로 github 소스 다운받기
다음과 같이 git clone repository 경로를 입력하면 로컬에 git 저장소를 가져올 수 있습니다.
[root@guruson gitClone]# git clone https://github.com/sonnaraon/HelloGitRepo.git
Cloning into 'HelloGitRepo'...
remote: Enumerating objects: 31, done.
remote: Counting objects: 100% (31/31), done.
remote: Compressing objects: 100% (24/24), done.
remote: Total 31 (delta 0), reused 28 (delta 0), pack-reused 0
Unpacking objects: 100% (31/31), done.
[root@guruson gitClone]# ls -la
total 4
drwxr-xr-x   3 root root   26 Jul 27 21:30 .
dr-xr-x---. 20 root root 4096 Jul 27 21:30 ..
drwxr-xr-x   5 root root  140 Jul 27 21:30 HelloGitRepo
[root@guruson gitClone]#
로컬로 가져온 레포지토리를 확인해보면
[root@guruson HelloGitRepo]# ls -la
total 40
drwxr-xr-x 5 root root  140 Jul 27 21:30 .
drwxr-xr-x 3 root root   26 Jul 27 21:30 ..
drwxr-xr-x 8 root root  163 Jul 27 21:30 .git
-rw-r--r-- 1 root root  303 Jul 27 21:30 .gitignore
drwxr-xr-x 3 root root   21 Jul 27 21:30 .mvn
-rw-r--r-- 1 root root  131 Jul 27 21:30 .tern-project
-rw-r--r-- 1 root root   15 Jul 27 21:30 README.md
-rw-r--r-- 1 root root 9114 Jul 27 21:30 mvnw
-rw-r--r-- 1 root root 5811 Jul 27 21:30 mvnw.cmd
-rw-r--r-- 1 root root 7333 Jul 27 21:30 pom.xml
drwxr-xr-x 3 root root   18 Jul 27 21:30 src
[root@guruson HelloGitRepo]# 
위 github 소스들이 로컬 레포지토리로 복사된 것을 확인할 수 있습니다.
2) git clone으로 복사한 소스를 내부 저장소로 이관합니다. (압축 후 내부 저장소 USB 등 이관)
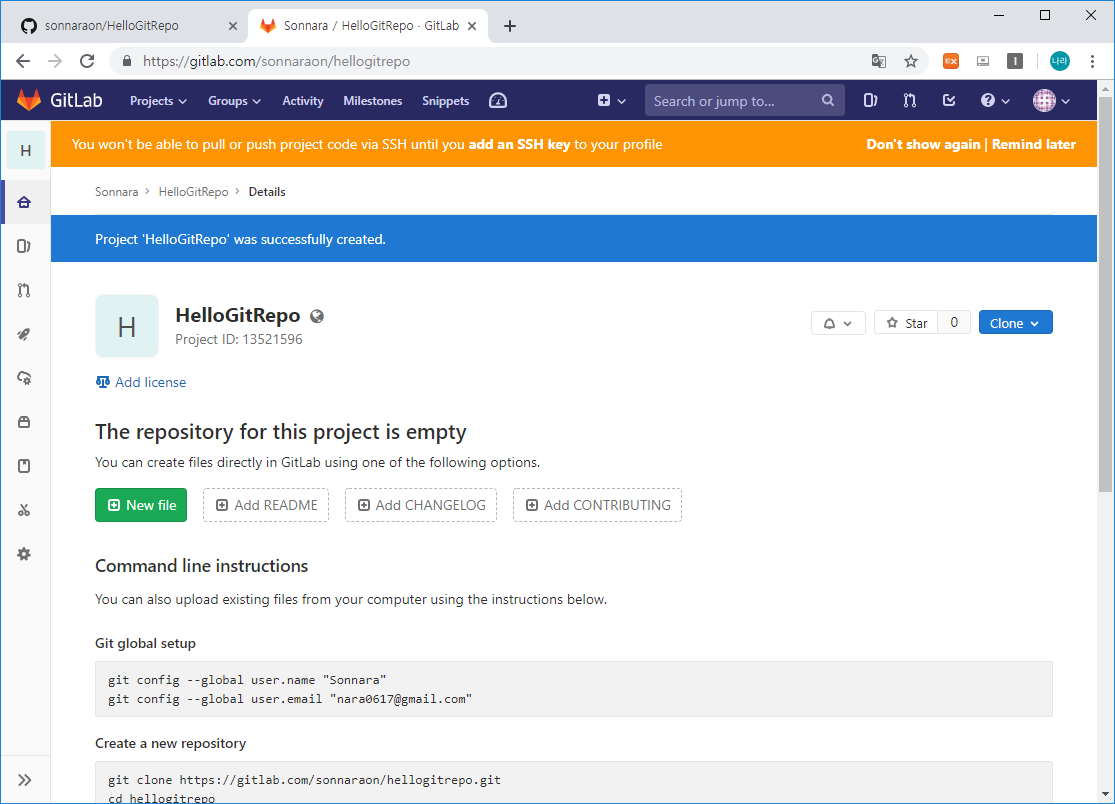
3) 이관한 HelloGitRepo 소스를 내부 gitlab으로 업로드합니다.
업로드 하는 과정은 다음과 같습니다.
a) gitlab project 확인
b) github로부터 다운로드 받은 HelloGitRepo를 push하기 위해 gitlab과 연결합니다.
[root@guruson HelloGitRepo]# git init
Reinitialized existing Git repository in /root/gitClone/HelloGitRepo/.git/
[root@guruson HelloGitRepo]# git remote remove origin
[root@guruson HelloGitRepo]# git remote add origin https://gitlab.com/sonnaraon/hellogitrepo.git
[root@guruson HelloGitRepo]#
- git init : git repository 정보를 초기화합니다.
- git remote remove : git 저장소의 origin 정보를 삭제합니다.
- git remote add : git 저장소에 origin을 gitlab으로 추가합니다.
c) git remote 저장소와 연결이 되었으면, 소스파일을 push합니다.
소스를 저장소로 업로드하기 위해서는 git에서는 총 2단계에 거쳐 업로드하게 됩니다. 먼저 git commit을 통해 로컬 레포지토리에 push할 대상을 저장합니다. 이후 git push를 통해 실제 저장소로 업로드를 진행하게됩니다.
[root@guruson HelloGitRepo]# git add .
[root@guruson HelloGitRepo]# git commit -m "First Commit"
# On branch master
nothing to commit, working directory clean
[root@guruson HelloGitRepo]# git push -u origin master
Username for 'https://gitlab.com': nara0617@gmail.com
Password for 'https://nara0617@gmail.com@gitlab.com':
Counting objects: 31, done.
Delta compression using up to 4 threads.
Compressing objects: 100% (24/24), done.
Writing objects: 100% (31/31), 53.27 KiB | 0 bytes/s, done.
Total 31 (delta 0), reused 0 (delta 0)
To https://gitlab.com/sonnaraon/hellogitrepo.git
 * [new branch]      master -> master
Branch master set up to track remote branch master from origin.
[root@guruson HelloGitRepo]#
- git add : commit과 push 대상으로 할 소스의 경로를 지정합니다.
- git commit : commit 대상을 선별하고 commit 시 남길 comment를 저장합니다.
- git push : git repository에 소스를 push합니다.
d) 다음과 같이 gitlab에 push된 소스를 확인합니다.

4) 다음으로 변경된 소스를 업데이트 하는 방법입니다.
gitlab과 eclipse를 연동하는 사용하는 것이 일반적이지만, 이에 대한 가이드는 제 포스팅 자료를 참고해 주시기 바랍니다.
c, php, cgi 등의 개발환경으로 linux, unix에서 직접 컴파일 경우나 이미 생성된 gitlab repository에 추가로 소스를 push해야하는 경우 등 cli 환경에서 직접소스를 push해야 하는 경우가 발생할 수 있습니다.
이럴 경우 어떻게 처리하는지 살펴보겠습니다.
[root@guruson HelloGitRepo]# git remote
origin
[root@guruson HelloGitRepo]# git add .
[root@guruson HelloGitRepo]# git commit -m "add index.jsp"
[master c9f3958] add index.jsp
 1 file changed, 1 insertion(+)
 create mode 100644 src/main/webapp/WEB-INF/jsp/index.jsp
[root@guruson HelloGitRepo]# git push -u origin master
Username for 'https://gitlab.com': nara0617@gmail.com
Password for 'https://nara0617@gmail.com@gitlab.com':
Counting objects: 14, done.
Delta compression using up to 4 threads.
Compressing objects: 100% (5/5), done.
Writing objects: 100% (8/8), 563 bytes | 0 bytes/s, done.
Total 8 (delta 2), reused 0 (delta 0)
To https://gitlab.com/sonnaraon/hellogitrepo.git
   7023406..c9f3958  master -> master
Branch master set up to track remote branch master from origin.
[root@guruson HelloGitRepo]#
- git remote, git add, git commit, git push 과정 모두 위에서 살펴본 과정과 동일합니다.
이때 git commit, git push 시점에 변경된 파일의 리스트를 확인할 수 있으며, 원하는 파일만 push하고자 할 경우 git add에서 해당 파일만 지정하거나 경로 하위를 지정할 수 있습니다.
5) 마지막으로 내부 gitlab으로 소스 이관이 완료가 되면 git remote 정보를 삭제하여 gitlab에 대한 접속 정보를 초기화 합니다.
[root@guruson HelloGitRepo]# git remote remove origin
[root@guruson HelloGitRepo]# git remote
[root@guruson HelloGitRepo]#
이와같이 git clone, git commit, git push를 사용하여 원하는 리포지토리 경로를 손쉽게 이관할 수 있습니다.
물론 인터넷이 되는 환경에서는 import 기능이나, clone url을 통해 손쉽게 이관이 가능하지만, 서로 다른 망의 환경에서 개발을 해야 하거나, 폐쇄망 소스 공개가 힘든 상황에서 기본 템플릿 환경을 가져오거나 할 경우, 선 개발된 오픈소스 코드를 가져와야 하는 경우 등에 적용하여 효율적으로 사용할 수 있을 듯 합니다.
# 참조
GitLab에서 GitLab으로 이관할 경우 유의사항 중 Token 정보의 갱신 문제가 발생할 수 있습니다.
gitlab-rake를 활용하여 backup & restore를 하는 방법은 많은 곳에서 포스팅되어 있기에 별도로 언급하지는 않겠으며, 다만, gitlab 이관 이후 아래와 같은 에러 발생 시 조치 방법에 대해 알아보자.
[/var/log/gitlab/gitlab-rails/production.log]
OpenSSL::Cipher::CipherError (): on changing project permissions to v11.9.0 Omnibus: OpenSSL::Cipher::CipherError (): on changing project permissions
위와 같은 로그가 발생하는 원인은 기존 GitLab에서 사용하던 Token 정보가 유효하지 않을 경우 발생한다.
조치 방법은 몇가지가 있지만, 다음과 같이 dbconsole을 활용하여 token 정보를 refresh할 수 있습니다.
a. nrson-PC gitlab> gitlab-rails dbconsole (dbconsole 접속)
b. postgresql에 저장되어 있는 token 정보를 refresh
- gitlab=# UPDATE projects SET runners_token = null, runners_token_encrypted = null;
- gitlab=# UPDATE namespaces SET runners_token = null, runners_token_encrypted = null;
- gitlab=# UPDATE application_settings SET runners_registration_token_encrypted = null;
- gitlab=# UPDATE ci_runners SET token = null, token_encrypted = null;
'⑤ 개발, 데이터베이스 > ⓢ Spring Boot' 카테고리의 다른 글
| [Spring Boot] Spring Boot Maven Repo 연동(Nexus2 OSS 내부 저장소) (0) | 2019.07.28 |
|---|---|
| [Spring Boot] Spring Boot Maven Repo 구축(Nexus2 OSS 내부 저장소) (0) | 2019.07.28 |
| [Spring Boot] gitlab & Eclipse 연동을 통한 Spring Boot 개발 프로젝트 구축 (1) | 2019.07.28 |
| [Spring Boot] Gradle Build 하기 (0) | 2019.07.21 |
| [Spring Boot] JUnit (embedded Servlet Container & Mockup Test) (0) | 2019.07.14 |
- Total
- Today
- Yesterday
- git
- aws
- SWA
- 마이크로서비스 아키텍처
- Docker
- MSA
- node.js
- wildfly
- API Gateway
- aa
- 아키텍처
- JBoss
- OpenStack
- k8s
- SA
- TA
- kubernetes
- Da
- 오픈스택
- jeus
- 마이크로서비스
- JEUS6
- openstack tenant
- apache
- webtob
- 쿠버네티스
- nodejs
- openstack token issue
- JEUS7
- Architecture
| 일 | 월 | 화 | 수 | 목 | 금 | 토 |
|---|---|---|---|---|---|---|
| 1 | ||||||
| 2 | 3 | 4 | 5 | 6 | 7 | 8 |
| 9 | 10 | 11 | 12 | 13 | 14 | 15 |
| 16 | 17 | 18 | 19 | 20 | 21 | 22 |
| 23 | 24 | 25 | 26 | 27 | 28 |