
티스토리 뷰
이번 포스팅에서는 python private registry 구축과정에 대해 살펴보겠습니다.
docker private registry 구성방안은 다음 포스팅을 확인하시기 바랍니다.
[Docker Registry] Docker Image를 활용한 Local Registry 구축
pypi(python package index)는 python package manager인 pip를 사용하여 python 관련 라이브러리를 인스톨할 수 있는 index로써 python 소프트웨어 저장소입니다.
python package도 역시 private 환경에서 구성하기 위해서는 private registry를 구축하여 운영해야하며, 이를 위해 pypi를 소개해 드리도록 하겠습니다.
pypi 설치
1. pypiserver 설치
[root@kubemaster ~]# pip3 install pypiserver
WARNING: Running pip install with root privileges is generally not a good idea. Try `pip3 install --user` instead.
Collecting pypiserver
  Downloading https://files.pythonhosted.org/packages/6d/66/c587bf07aea6393acae49ad3d8b0fe32a04f388cfc9c495abe88da77bb85/pypiserver-1.3.1-py2.py3-none-any.whl (74kB)
    100% |--------------------------------------------------| 81kB 204kB/s
Installing collected packages: pypiserver
Successfully installed pypiserver-1.3.1
[root@kubemaster ~]#
pypiserver는 말 그대로 pypi를 관리하는 server 모듈입니다.
설치가 완료되면, 특정 위치에 python package 들을 관리 할 디렉토리를 생성합니다.
[root@kubemaster ~]# mkdir pythonpackage
[root@kubemaster ~]#
2. pypi 관리 계정 생성 (htpasswd -sc htpasswd.txt admin)
[root@kubemaster ~]# yum install -y httpd-tools
Resolving Dependencies
--> Running transaction check
---> Package httpd-tools.x86_64 0:2.4.6-90.el7.centos will be installed
--> Processing Dependency: libaprutil-1.so.0()(64bit) for package: httpd-tools-2.4.6-90.el7.centos.x86_64
--> Processing Dependency: libapr-1.so.0()(64bit) for package: httpd-tools-2.4.6-90.el7.centos.x86_64
--> Running transaction check
---> Package apr.x86_64 0:1.4.8-5.el7 will be installed
---> Package apr-util.x86_64 0:1.5.2-6.el7 will be installed
--> Finished Dependency Resolution

Dependencies Resolved

====================================================================================================================
 Package                     Arch                   Version                              Repository            Size
====================================================================================================================
Installing:
 httpd-tools                 x86_64                 2.4.6-90.el7.centos                  base                  91 k
Installing for dependencies:
 apr                         x86_64                 1.4.8-5.el7                          base                 103 k
 apr-util                    x86_64                 1.5.2-6.el7                          base                  92 k

Transaction Summary
====================================================================================================================
Install  1 Package (+2 Dependent packages)

Total download size: 286 k
Installed size: 584 k
Downloading packages:
(1/3): apr-1.4.8-5.el7.x86_64.rpm                                                            | 103 kB  00:00:00
(2/3): httpd-tools-2.4.6-90.el7.centos.x86_64.rpm                                            |  91 kB  00:00:00
(3/3): apr-util-1.5.2-6.el7.x86_64.rpm                                                       |  92 kB  00:00:00
--------------------------------------------------------------------------------------------------------------------
Total                                                                               1.6 MB/s | 286 kB  00:00:00
Running transaction check
Running transaction test
Transaction test succeeded
Running transaction
  Installing : apr-1.4.8-5.el7.x86_64                                                                           1/3
  Installing : apr-util-1.5.2-6.el7.x86_64                                                                      2/3
  Installing : httpd-tools-2.4.6-90.el7.centos.x86_64                                                           3/3
  Verifying  : apr-1.4.8-5.el7.x86_64                                                                           1/3
  Verifying  : httpd-tools-2.4.6-90.el7.centos.x86_64                                                           2/3
  Verifying  : apr-util-1.5.2-6.el7.x86_64                                                                      3/3

Installed:
  httpd-tools.x86_64 0:2.4.6-90.el7.centos

Dependency Installed:
  apr.x86_64 0:1.4.8-5.el7                               apr-util.x86_64 0:1.5.2-6.el7

Complete!
[root@kubemaster ~]# pip3 install passlib
WARNING: Running pip install with root privileges is generally not a good idea. Try `pip3 install --user` instead.
Collecting passlib
  Downloading https://files.pythonhosted.org/packages/ee/a7/d6d238d927df355d4e4e000670342ca4705a72f0bf694027cf67d9bcf5af/passlib-1.7.1-py2.py3-none-any.whl (498kB)
    100% |-----------------------------------------------------| 501kB 646kB/s
Installing collected packages: passlib
Successfully installed passlib-1.7.1
[root@kubemaster ~]# htpasswd -sc htpasswd.txt admin
New password:
Re-type new password:
Adding password for user admin
[root@kubemaster ~]#
centos에서 htpasswd를 사용하기 위한 httpd-tools를 설치하고, pip로 passlib를 설치합니다.
htpasswd를 사용하여 pypiserver를 기동할 때 사용할 비밀번호를 지정합니다.
3. pypiserver 기동 (pypi-server -p 8080 -P htpasswd.txt ~/pythonpackage/ &)
[root@kubemaster ~]# pypi-server -p 8080 -P htpasswd.txt ~/pythonpackage/ &
[root@kubemaster ~]#
기동 방법은 매우 간단합니다. pypi-server -p [접근 포트] -P [passwd 파일] [python package 경로]를 입력하면, 기동이 완료됩니다.
4. pypiserver 접속
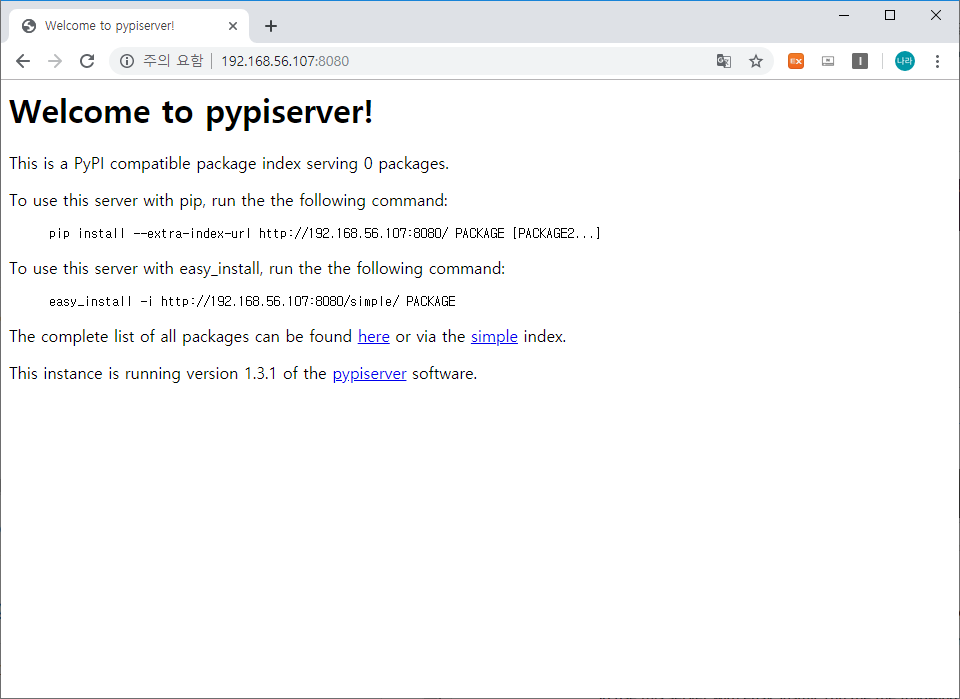
접속하면 위와 같은 Welcome 화면에 접속할 수 있습니다.
5. python Package 구성
python package가 구성되면 접근하기 위한 rc 파일을 먼저 작성해 보도록 하겠습니다.
[root@kubemaster ~]# cat ~/.pypirc
[distutils]
index-servers =
  local

[local]
repository: http://192.168.56.107:8080
username: admin
password: 123qwe
[root@kubemaster ~]#
python package를 구성하기 위해 setup.py 파일을 작성합니다.
[root@kubemaster ~]# cat setup.py
#!/usr/bin/env python

from setuptools import setup

setup(
        name='python_private_registry',
        version='1.0',
        description='Python Distribution Utilities',
        author='nrson',
        author_email='son.nara@lgcns.com',
)
[root@kubemaster ~]#
이제 setup.py 파일을 기반으로 private registry에 python package를 업로드 할 수 있습니다.
현재 python에서 제공하는 python package를 확인하기 위해 다음과 같이 수행합니다.
[root@kubemaster ~]# wget https://pypi.python.org/simple
--2019-10-13 20:23:17--  https://pypi.python.org/simple
Resolving pypi.python.org (pypi.python.org)... 151.101.76.223, 2a04:4e42:12::223
Connecting to pypi.python.org (pypi.python.org)|151.101.76.223|:443... connected.
HTTP request sent, awaiting response... 301 Redirect to Primary Domain
Location: https://pypi.org/simple [following]
--2019-10-13 20:23:18--  https://pypi.org/simple
Resolving pypi.org (pypi.org)... 151.101.0.223, 151.101.128.223, 151.101.192.223, ...
Connecting to pypi.org (pypi.org)|151.101.0.223|:443... connected.
HTTP request sent, awaiting response... 301 Moved Permanently
Location: https://pypi.org/simple/ [following]
--2019-10-13 20:23:19--  https://pypi.org/simple/
Reusing existing connection to pypi.org:443.
HTTP request sent, awaiting response... 200 OK
Length: 10723048 (10M) [text/html]
Saving to: imple

100%[==========================================================================>] 10,723,048   101KB/s   in 2m 54s

2019-10-13 20:26:13 (60.2 KB/s) - implesaved [10723048/10723048]

[root@kubemaster ~]#
다운로드 받은 simple 파일을 열어보면 대략 20만개에 가까운 python package를 확인할 수 있습니다.
      1 <!DOCTYPE html>
      2 <html>
      3   <head>
      4     <title>Simple index</title>
      5   </head>
      6   <body>
      7     <a href="/simple/0/">0</a>
      8     <a href="/simple/0-0/">0-._.-._.-._.-._.-._.-._.-0</a>
      9     <a href="/simple/0-0-1/">0.0.1</a>
     10     <a href="/simple/00print-lol/">00print_lol</a>
     11     <a href="/simple/00smalinux/">00SMALINUX</a>
     12     <a href="/simple/01changer/">01changer</a>
     13     <a href="/simple/01d61084-d29e-11e9-96d1-7c5cf84ffe8e/">01d61084-d29e-11e9-96d1-7c5cf84ffe8e</a>
     14     <a href="/simple/021/">021</a>
     ...
     ...
     ...
 199717     <a href="/simple/zzz/">zzz</a>
 199718     <a href="/simple/zzzeeksphinx/">zzzeeksphinx</a>
 199719     <a href="/simple/zzzfs/">zzzfs</a>
 199720     <a href="/simple/zzzutils/">zzzutils</a>
 199721     <a href="/simple/zzz-web/">zzz-web</a>
 199722     <a href="/simple/zzzzzzzzz/">zzzZZZzzz</a>
 199723     </body>
 199724 </html>
package 명은 href로 접근가능한 name이 python package입니다.
예를 들어 첫번째 0이라는 python package를 확인하기 위해서는 다음과 같이 수행할 수 있습니다.
[root@kubemaster ~]# wget https://pypi.python.org/simple/0
--2019-10-13 20:37:32--  https://pypi.python.org/simple/0
Resolving pypi.python.org (pypi.python.org)... 151.101.196.223, 2a04:4e42:12::223
Connecting to pypi.python.org (pypi.python.org)|151.101.196.223|:443... connected.
HTTP request sent, awaiting response... 301 Redirect to Primary Domain
Location: https://pypi.org/simple/0 [following]
--2019-10-13 20:37:33--  https://pypi.org/simple/0
Resolving pypi.org (pypi.org)... 151.101.64.223, 151.101.128.223, 151.101.0.223, ...
Connecting to pypi.org (pypi.org)|151.101.64.223|:443... connected.
HTTP request sent, awaiting response... 301 Moved Permanently
Location: https://pypi.org/simple/0/ [following]
--2019-10-13 20:37:35--  https://pypi.org/simple/0/
Reusing existing connection to pypi.org:443.
HTTP request sent, awaiting response... 200 OK
Length: 408 [text/html]
Saving to:

100%[==========================================================================>] 408         --.-K/s   in 0s

2019-10-13 20:37:35 (96.4 MB/s) - saved [408/408]

[root@kubemaster ~]#
그럼 sdist라는 python package를 업로드 해보도록 하겠습니다.
[root@kubemaster ~]# python3 setup.py sdist upload -r local
running sdist
running egg_info
creating python_private_registry.egg-info
writing python_private_registry.egg-info/PKG-INFO
writing dependency_links to python_private_registry.egg-info/dependency_links.txt
writing top-level names to python_private_registry.egg-info/top_level.txt
writing manifest file 'python_private_registry.egg-info/SOURCES.txt'
reading manifest file 'python_private_registry.egg-info/SOURCES.txt'
writing manifest file 'python_private_registry.egg-info/SOURCES.txt'
warning: sdist: standard file not found: should have one of README, README.rst, README.txt, README.md

running check
warning: check: missing required meta-data: url

creating python_private_registry-1.0
creating python_private_registry-1.0/python_private_registry.egg-info
copying files to python_private_registry-1.0...
copying setup.py -> python_private_registry-1.0
copying python_private_registry.egg-info/PKG-INFO -> python_private_registry-1.0/python_private_registry.egg-info
copying python_private_registry.egg-info/SOURCES.txt -> python_private_registry-1.0/python_private_registry.egg-info
copying python_private_registry.egg-info/dependency_links.txt -> python_private_registry-1.0/python_private_registry.egg-info
copying python_private_registry.egg-info/top_level.txt -> python_private_registry-1.0/python_private_registry.egg-info
Writing python_private_registry-1.0/setup.cfg
creating dist
Creating tar archive
removing 'python_private_registry-1.0' (and everything under it)
running upload
Submitting dist/python_private_registry-1.0.tar.gz to http://192.168.56.107:8080
192.168.56.107 - - [13/Oct/2019 21:00:28] "POST / HTTP/1.1" 200 0
Server response (200): OK
[root@kubemaster ~]#
위와같이 python3 setup.py [package] upload -r local 형식으로 업로드를 진행하면, 앞서 생성한 python package 디렉토리에 아래와 같이 업로드 된것을 확인할 수 있습니다.
[root@kubemaster pythonpackage]# pwd
/root/pythonpackage
[root@kubemaster pythonpackage]# ls
python_private_registry-1.0.tar.gz
[root@kubemaster pythonpackage]#
테스트로 생성한 파일이기에 위와 같이 파일명이 생성되었지만, 이후 python private registry를 관리하기 위해서는 setup.py 파일 명에 기준을 세워 작성하는 것이 중요할 듯 합니다.

위와 같이 업로드가 완료된 파일을 브라우저에서 확인할 수 있습니다.
6. Python Private Registry 적용하기 (pip3 install --extra-index-url)
업로드가 완료되면 이제 해당 private registry에서 Package를 다운로드 받아 설치해 보도록 하겠습니다.
[root@kubemaster pythonpackage]# pip3 install --extra-index-url http://192.168.56.107:8080 --trusted-host 192.168.56.107 python_private_registry
WARNING: Running pip install with root privileges is generally not a good idea. Try `pip3 install --user` instead.
Collecting python_private_registry
  Downloading http://192.168.56.107:8080/packages/python_private_registry-1.0.tar.gz
Installing collected packages: python-private-registry
  Running setup.py install for python-private-registry ... done
Successfully installed python-private-registry-1.0
[root@kubemaster pythonpackage]#
위와같이 --extra-index-url을 적용하고 Package Name을 입력하여 업로드 했던 Registry를 다운로드 받아 설치하는 것을 확인할 수 있습니다. 이를 활용하여 Python Package를 Private 환경으로 이관하거나, 개발한 Python Package를 업로드하여 관리할 수 있을 것입니다.
'⑤ 개발, 데이터베이스 > ⓒ CI CD' 카테고리의 다른 글
| [python3] 폐쇄망 환경에서 python3를 이용한 ansible 설치 (0) | 2019.10.23 |
|---|---|
| [python] package install (python3 setup.py install) (0) | 2019.10.13 |
| [Jenkins] Pipeline Syntax (젠킨스 파이프라인 문법) (0) | 2019.09.22 |
| [Jenkins] 사용자 관리 및 권한 관리 방안 (6) | 2019.09.22 |
| [Jenkins] Jenkins를 활용한 WildFly CI/CD 환경 구성 (0) | 2019.09.22 |
- Total
- Today
- Yesterday
- aws
- SA
- node.js
- SWA
- 쿠버네티스
- MSA
- JEUS6
- webtob
- Da
- 오픈스택
- API Gateway
- jeus
- 마이크로서비스
- TA
- Docker
- openstack token issue
- wildfly
- 마이크로서비스 아키텍처
- OpenStack
- nodejs
- 아키텍처
- Architecture
- openstack tenant
- JEUS7
- git
- JBoss
- apache
- aa
- kubernetes
- k8s
| 일 | 월 | 화 | 수 | 목 | 금 | 토 |
|---|---|---|---|---|---|---|
| 1 | 2 | 3 | 4 | 5 | 6 | |
| 7 | 8 | 9 | 10 | 11 | 12 | 13 |
| 14 | 15 | 16 | 17 | 18 | 19 | 20 |
| 21 | 22 | 23 | 24 | 25 | 26 | 27 |
| 28 | 29 | 30 |